Copyright TheBeachcats.com

Please Support
TheBeachcats.com
Hobie-18 rudder castings come in two flavors: Pre-1987 and 1987 on. They’re easy to tell apart, as the newer systems use a plastic cam to hold and release the upper casting, while the older systems use a metal one. Both are supposed to work the same way, with the rudder kicking up when an obstacle is encountered or when the skipper wishes to beach the boat. However, the pre-1987 Hobie-18 rudders have an annoying habit of not releasing or kicking up when you want them to. I’ve even busted a tiller arm or two yanking up on them to try to get a rudder to release. I always had to keep a tool with a long end that I could insert from behind the release cam in order to trip the mechanism whenever things would stick – not very convenient or even safe under some circumstances.
NOTE: I experienced this breakage myself TWICE!See a picture of my broken casting here. Damon Linkous
Now, for those of us with older boats, we can pay the money for the upgrade kit, which, as expensive as it seems, is a good deal for all the parts involved. And it is a significant improvement. Or we can suffer along, with our special tools and excuses, hoping we don’t get stuck in the mud or break something we can’t replace because even though it is a good deal, the upgrade is still expensive. We’d rather spend that scratch on other bits and pieces (A new jib! Half of a new main! Part of a spinnaker!) or at our favorite watering hole. But, be advised, any strategy for making your old castings last may just be delaying the inevitable. You can’t buy new replacements for most of the old system, making used parts your only hope. My advice is to horde replacement parts whenever you run across them. Or just give in and buy the upgrade…
Me, I got tired of slamming around trying to get my rudders to release. I got tired of having to get the tool set just right to trip the latch. My crew got tired of hearing the same cuss-words over and over again - after awhile even I run out and have to re-use a few! And I don’t feel like spending the money on the upgrade just yet. Instead I spent it on the racing rudder blades that make the boat sail sooooo much better. So I started to dream of a way to release my rudders at will. Pathetic thing to dream about, I know. But we all need our dreams.
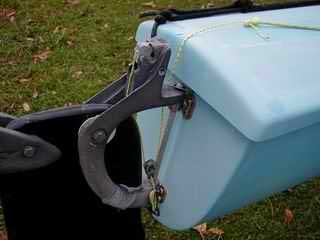 It turns out there is a simple way to do this. And I can report that after a full season or two using it, it works pretty well. All you need in the way of parts and tools is some thin cord, two small blocks, a punch, drill, drill bits, a small file, and some patience. Basically what I did was rig a line that will pull on and release the cam when you pull on it, freeing the upper castings and allowing the rudder to pop up. This is what it looks like:
To do this, I removed the rudders from the lower castings and the castings from the boat. I mounted some gudgeons on my workbench and attached the castings to those. You can be more daring and do it on your boat if you wish. I did it in the privacy of my own basement to avoid embarrassment in case I destroyed non-replaceable parts. Proceed as you deem prudent, and I take no responsibility for any modifications attempted/undertaken by you to your boat…
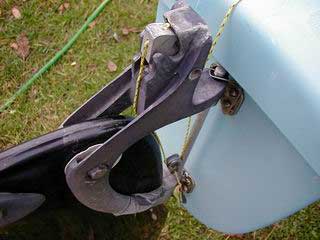
Find something to wedge the cam in place, preferably downwards (compressing the spring). What you are going to do is drill a hole through the back of the cam, top to bottom, at an angle. The top of the hole should be about in the middle of the top of the cam, maybe a bit towards the back. Pick a spot and mark it the punch. Then drill a hole at an angle so it exits like in the picture. Use a good bit, just larger than the diameter of the cord, and go slow – the bit will be small and easy to break off. When the hole is complete, use a larger bit to enlarge the top of the hole just large enough to fit a stopper knot in the cord. You don’t want that knot getting in the way of the upper casting.
While you’ve got the drill out, drill a hole in the part of the casting that forms the upper gudgeon mount. Drill it about half way between the tower and the rudder pin, and make it just larger than the diameter of the cord. For all the holes you drill use the small file to smooth the edges.
Tie a small block to the lower rudder pin mounting area. Now, run a piece of cord through the hole in the cam, behind the tower, through the small block, up through the upper mount hole to freedom! Put a small stopper knot in the end at the cam, and pull it into the enlarged hole. It doesn’t need to be completely flush, but you don’t want it to interfere with things. For the other end, I ran that long enough to get onto the aft deck, and then I tied it to a larger diameter line that would be easier to grab. That line I dead-ended on the aft tramp lacing, running underneath the rear crossbar. It should be tight enough that it is not flopping around too much, but loose enough to not restrict rudder movement and be easy to grab.
Since that was so much fun, do it again for the other rudder. This modification should not affect the normally crappy functionality of the old-style rudder castings. They will still lock the same, and they will still maybe or maybe not release when you pull on the tiller arm or hit that sunken fishing boat. But! When you pull on the line on the aft deck, you will now be able to release the rudder without drama. It almost takes the fun out the whole ancient Hobie-18 thing!
The only problems I’ve run into with this setup is that occasionally the cord used to tie the blocks on gets cut by the gudgeon screws. If this happens the release will still work, but you’ll have extra line and it will not be as smooth. Once one of the stopper knots came undone. You could easily find a better mounting method for the block, and a dollop of epoxy might keep the knot intact. All in all, this has been a major improvement!
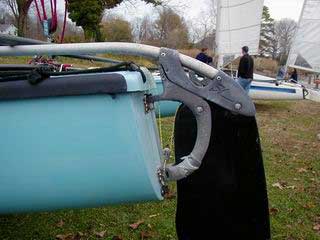
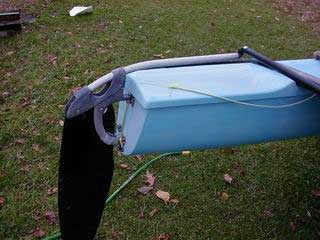
Some other views:
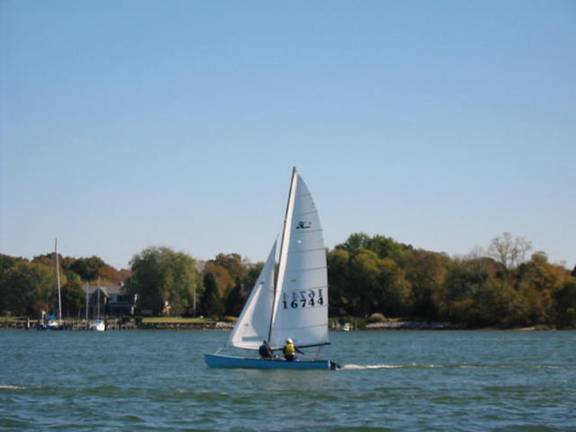
A totally gratuitous shot of the boat under sail:
Comments
Add a new comment