A step-by-step illustrated guide
By Bill Mattson
First published in "On The Wire" Ezine.
If you own a Hobie Cat, you may have noticed that if you take on any water, it is virtually impossible to get it out, given the location of the drain plugs. You can raise the bows, but unless you point them straight to the sky, you are going to have some water left in the boat when you are done. Deck ports will accomodate a far more effective and convenient way to remove water.
This month, we install them in a couple of Hobie 16s. If you are even thinking about doing this, or wonder why anyone would, read on. We cover each step in detail, and give you a good idea of what to expect along the way. Let’s face it: If you are going to take a saw to your boat, you want as much information as you can get before you start cutting. This article provides fully illustrated step-by-step procedures to help you do the job right...
Why did I decide to install deck ports?
To explain why I ever considered installing deck ports in the first place, I need to go back to an incident a few weekends ago.
My son and I had just finished rigging our Hobie 16 "Tomcat", when I noticed that the hulls were sitting far lower in the water than usual. Soon after, I was yelling "We left the plugs out!" over and over, and was running for the truck. After we muscled the boat up onto the trailer and watched water stream from the hulls for about 20 minutes, I began contemplating the effect of long term moisture remaining in the hulls. I knew I would not be able to get all of the water out, and figured that I had really soaked the pylon mounts pretty good.
The implications of long term moisture were recently discussed on the Hobie Mailing List. It was suggested that delamination could occur as water soaks exposed glass fibers and the hull is subjected to warming and cooling. My discussions with several parties reveal this claim to be somewhat controversial. One would have to agree, however, that water will make the boat heavier and, depending upon the amount, can significantly effect weight distribution as it rolls back and forth. It would be safe to state that, given the choice, most sailors would take dry hulls over wet hulls.
Hull ports give you the choice.
The primary reason for installing deck ports is that, using a sponge, you can dry the hulls of all standing water. You may then trailer the boat with the hull ports open, which further dries them with the resulting ventilation. A secondary reason for installing the ports is storage. Bags are available, which hang within the ports to provide convenient, secure storage
for tools, safety equipment and other small items. One of my dilemmas has been where to keep my car keys on the boat, and a port bag would be a great spot. In the past, I have threaded the key ring around one of the shrouds. I figured if I ever snap a shroud and demast the boat, I may as well finish the day by not having a ride home.
Where should they be installed?
Prior to installing the deck ports, the Hobie List was consulted for opinions on where the ports should be installed. Hobie parts dealers who carry the ports were also asked for opinions on the installation location. Opinions among sailors will vary (now there’s a surprise!). One dealer stated that installing the deck port in front of the forward pylon was a good choice, while another stated that this location would severely compromise the integrity of the boat due to loads from the forestay and water swells. It was even mentioned on the Hobie List that a hull was fractured at a forward deck port after a collision with a 500lb. sea turtle. The contributing factor of the deck port is a matter of contention, however, as is the assumed weight of the turtle. Here are the pros and cons mentioned by informed sources on each of the 3 possible positions:
Just forward of the forward pylon
PRO:
Easy access for sponging and storage.
Easy access to front pylons, should they ever need work.
CON:
Alleged structural compromise.
Not suitable for ramming heavy shelled sea animals.
Between forward and aft pylons
PRO:
Least compromise to structural integrity
CON:
Difficult access for sponging and storage. Inferior match to deck contour.
Must remove tramp frame to install.
Aft of aft pylons
PRO:
Easy access for storage.
Access to rudder grugeons, if service is required.
CON:
Difficult to sponge water on beach or trailer without raising bows.
We tried 2 positions, installing in the forward position on a 1980 Hobie 16, and in the middle position on a 1981 Hobie 16.
Note that this is not a one day job, since it is required that you wait 24 hours for the RTV sealant to dry before installing
the bolts.
What you will need
Parts:
1 deck port kit
1 small can of polyester resin with hardener
Tools:
A sabre saw
A drill
A half round file
Medium grit sandpaper
Small screwdriver
Wrench
Platter and applicator for resin (we used a paper plate and plastic spoon)
Measuring tape
Felt tip marker
Paper
Wide masking tape
Our kits were purchased from Murray’s marine, 1 in black and 1 in white. The only difference noted was the claim that the black offers superior UV protection. Each kit contained 2 ports, a tube of marine RTV sealant, and plastic bolts and nuts. Note that the bolts included should match the color of the port. A very limited set of instructions is included, which we found to be inadequate in addressing the sealing of the foam sandwich which is exposed by the cut. This issue is approached using the polyester resin purchased separately.
 The Job
Start by removing one of the ports and tracing the lower portion of the port onto a sheet of paper. Note that this pattern will not be entirely accurate, since the lower portion of the port is smaller in diameter. You will need to take this into consideration when making the cut.

Cut out the pattern.

Using the tape measure and one of the ports, decide where it is to be installed. For the ports we installed in the forward position, we positioned the port with the forward edge 12 inches from pylon, then used the bridle mount as a measuring reference to insure both sides were the same.
Note that if you have elected to place your ports between the pylons, it is suggested that the trampoline be completely removed prior to starting the job.

Measure from each side of the deck to center the port, then trace the pattern using the marker.

There are many sabre blades to choose from. We used a narrow sheet metal blade, since the fine teeth would reduce chipping, and the narrow width would allow the curved cut. Remember that the round portion of deck will be discarded, so it offers a good testing platform to make sure the blade you choose is suitable. Drill a hole near the center of the circle. (That’s right. Take a drill and make a hole in your boat!)

Tape the deck to protect it from the saw.

Using the saw, make a test cut which is curved to check both the chipping and turning properties of the blade. (That’s right. Take a saw to your boat!) If you are chipping up the surface, try a finer blade. If you can’t turn the blade, try a smaller one.

Once you have selected and tested the blade, drill another hole, this one near the edge of the cut. Don’t worry about getting right out to the edge here. You can get closer with the file if you need to later.

Start cutting out the hole by following your pattern. Remember that the pattern may be slightly smaller than the port. Also, you will be adding some resin the edge of the hole, so you should be following the outside of the line, and possibly 1/16 of an inch more depending upon the size of the marker. Examine the port, and you will see that you have some room for error here.

If you are doing the job on a warm day, you may be surprised by the warm swampy air that will come from the hole you just cut. You may also be surprised by the amount of water laying in the hull.

Next, file the irregular contours of the hole, making it nice and round.

Test fit the port, and file some more if necessary. You want a slightly loose fit here. We are about to narrow the hole with some resin, so you will need the extra room. If you end up jamming the port into the hole, you will warp it and will never get the cover on.
 Repeat all of the steps above for both hulls before continuing.
Mix the resin and hardener as directed on the container.

Apply the resin to the entire edge of both holes. While the RTV to be applied later will seal the deck from the outside, the kit nor the instructions take into account water from the inside of the hull. Without the resin, there is a potential that dampness can enter the foam sandwich, especially if the boat is turtled and contains water. When applying the resin, make sure the entire foam surface is sealed.

Once the resin has hardened, sand any excess with the medium grit sandpaper. On each side, test fit the port, and sand more if required.

Remember, the ring must fit without any force. Even a slight force may distort the ring and make
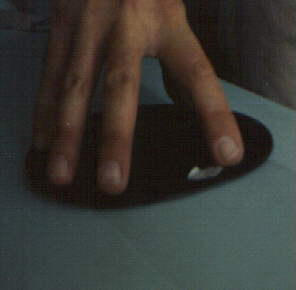
installation of the cover difficult. Note in the figure that we have marked the deck ring with a small piece of tape. Since the port is contoured slightly, you want to mark it in an obvious way, so that it is not fitted improperly once the sealant is applied. Once the port fits properly, you should note that the contour does not match perfectly. Since attempting to match the contour by forcing down the ring would distort it, you will need to fill these areas with RTV.
Once the port sufficiently fits into the hole, apply the RTV to the deck.

Apply RTV to the deck ring, applying a generous amount in the areas that will not be flush with the deck.

Press the port into place. Note any areas which may require additional RTV. We were able to fill these areas with the port installed using the nozzle tip supplied with the sealant. Once both ports are installed in this manner, you should allow 24 hours for the RTV sealant to dry before performing the additional steps.
 After 24 hours:
Drill out the holes with the hand drill.

Install the plastic nuts and bolts provided. Try not to drop any. They are difficult to find in the hulls, and our kit only supplied 1 extra.

That’s it. You’re done.

Note that there are Styrofoam floats which are contained in each hull. When sponging water from ports installed in the
middle position (between the pylons), the floats can be slid aft to permit room to access the water. I installed my ports with the leading edge approximately 20 inches aft of the forward pylons and can slide the floats aft
just enough to use the sponge. It was clear from the beginning that had I installed them any further forward, the shroud would hinder access. However, not until I had cut the hole, did I realize that
had I installed them any further aft, it is likely that the float would have
prevented access to sponge out water.
It should also be noted that the ports matched the deck contour much better in the forward position. We were able to hide the mismatch somewhat by allowing more gap towards the inside of the boat and applying additional sealant there. What I found to be perfect match with the middle position, however, was the area where the water settles when the boat is on the beach. On a recent 4 day trip the boat was never on the trailer. I was able to sponge the hulls dry each afternoon on the beach, since the water was settled just under the port. At the end of the trip, the boat was trailered home with the ports open to ventilate the hulls.
Before, I never really new how much water I was carrying around. Now, I take a peek into the port and see the bone dry interior of the hulls. This job is definately worth the what little work it requires.

Comments
Add a new commentI bought .5" foam on-line but it is too thick. I then ordered the next narrower thickness and it was fine.
The thicker foam does work for other areas in need of cushioning, fortunately like inside mast storage tubes etc.