Welcome anonymous guest

Please Support
TheBeachcats.com

Spirit 17 in Rehab  Bottom

Go to page 1 - 2 [+1]:

  • Okay - so here's the deal. I've been carefully following the America's Cup and the Volvo Ocean Race. I'm a huge VOR fan. And I own a monohull (Catalina 27) that I've sailed like crazy over the past 3-4 years. And I do 3-4 off-shore ocean races each year on cruising class boats.

    But the AC got me excited about this whole multi-hull insane speed thing.

    So, while the VOR is going crazy trying to figure out how to build a fast mono that won't break.

    http://www.mclubemarine.com/images/puma/large/pumaabove.jpg

    There are guys like Loick Peyron blowin' world records in the Jules Verne...on a multi...

    http://2.bp.blogspot.com/-0xsp5tdaxpQ/TwglebbO5sI/AAAAAAAANBw/k7yUhCk-ZtI/s640/TROPHEE+JULES+VERNE+BANQUE+POPULAIRE+V.jpg

    So, I figured, I gotta get me some of that. That's why I bought this horribly crappy Spirit 17.

    http://i449.photobucket.com/albums/qq219/smackdaddy_photo/Posts/5I25E85Ka3nc3J63Ncc68316ff88cec401e1a.jpg

    http://i449.photobucket.com/albums/qq219/smackdaddy_photo/Posts/IMG_2253.jpg

    http://i449.photobucket.com/albums/qq219/smackdaddy_photo/Posts/IMG_2288.jpg

    It needs so much work it's not even funny. But it'll splash.

    The nice thing is - it's the first step in my long-term plan of humiliating Monsieur Peyron.

    Just wait pal. You sail your little AC45 like a bat out of hell. But be watching over your shoulder for a '70's vintage, rainbow regaled, beach cat clawing up your butt. That'll be me, dude.

    So, this thread will keep everyone, including Monsieur Peyron, informed of our progress in rahabbing the drunken old sow. Fair's fair right?

    It's going to be slow and painful...just look at these wooden rudders...

    http://i449.photobucket.com/albums/qq219/smackdaddy_photo/Posts/IMG_2255.jpg
  • Okay - so begins the epic saga to "fix up the old girl"...

    My first round of advice, if you're going to buy a crappy old beach cat, make sure it's ready to sail as-is. You can spend a fortune fixing things if you're the kind of person that "wants to do it right". I'm not that kind of person - at least not for this boat. I paid $200 for the boat, trailer and 2 sets of fairly good sails. And I could very easily spend another $1,000 or more if I wanted it to be mint. I don't.

    I just want to use it as a learning and fun opportunity for me and my little boys. We can learn about fiberglass work, rigging, painting, etc. without worrying about screwing something expensive up. Then we can have a hell of a lot of fun learning to sail a cat - until it falls apart. If we love it, we can then buy a Nacra F18 or something.

    So, this project is all about seeing how inexpensively and creatively I can get this thing looking pretty tasty (from 20' feet away) and sailing pretty well (at least on days it's not blowing 70 knots). It's kind of a challenge thread, where I'll ask for advice on how cheaply/creatively this stuff can be done; then report back on how much of a disaster (or success) it was.

    The first order of business was a good power-washing, then taking the whole thing apart. The tramp needed re-stitching, the castings needed painting, and the hulls needed a hell of a lot of work.

    http://i449.photobucket.com/albums/qq219/smackdaddy_photo/Cat_Progress/c3529365.jpg

    First to the castings...a good cleaning with acetone, then a couple of cans of spray paint...

    http://i449.photobucket.com/albums/qq219/smackdaddy_photo/Cat_Progress/e22194de.jpg

    http://i449.photobucket.com/albums/qq219/smackdaddy_photo/Cat_Progress/15ae6374.jpg

    http://i449.photobucket.com/albums/qq219/smackdaddy_photo/Cat_Progress/5fc2b5ef.jpg

    http://i449.photobucket.com/albums/qq219/smackdaddy_photo/Cat_Progress/8b319fb4.jpg

    Then to the seriously crappy patch jobs on the hull - which you can see in this photo...

    http://i449.photobucket.com/albums/qq219/smackdaddy_photo/Cat_Progress/45dd12be.jpg

    The starboard hull was in pretty good shape, but the port hull (beneath patch in photo) had been crushed by wearing thin on the beach, then having some fatty climb on the tramp while it was on the trailer, crushing a section and holing it in two places.

    So, first we cleaned and sanded the area, then made a shaped backer by laying-up over wax paper on the hull area we were going to cut out....(learned all this on YouTube)...

    http://i449.photobucket.com/albums/qq219/smackdaddy_photo/Cat_Progress/0b74e12d.jpg

    Then we pulled out the saw and went to town...

    http://i449.photobucket.com/albums/qq219/smackdaddy_photo/Cat_Progress/f650d668.jpg

    Then we sanded back at roughly 12:1...

    http://i449.photobucket.com/albums/qq219/smackdaddy_photo/Cat_Progress/43b3eb46.jpg

    We cut and glued in the backer-plate, held in place by eye-screws and fishing line...

    http://i449.photobucket.com/albums/qq219/smackdaddy_photo/Cat_Progress/f45676db.jpg

    And finally started laying up the new glass...

    http://i449.photobucket.com/albums/qq219/smackdaddy_photo/Cat_Progress/402ca838.jpg

    http://i449.photobucket.com/albums/qq219/smackdaddy_photo/Cat_Progress/00cb1baf.jpg

    http://i449.photobucket.com/albums/qq219/smackdaddy_photo/Cat_Progress/82cc0459.jpg

    Then it was on to filling and faring the other hull...

    http://i449.photobucket.com/albums/qq219/smackdaddy_photo/Cat_Progress/a5367801.jpg

    http://i449.photobucket.com/albums/qq219/smackdaddy_photo/Cat_Progress/50da810f.jpg

    http://i449.photobucket.com/albums/qq219/smackdaddy_photo/Cat_Progress/d6996248.jpg

    And finally...blading off the stripes...

    http://i449.photobucket.com/albums/qq219/smackdaddy_photo/Cat_Progress/f9b0a6e7.jpg

    Coming up...the top decks which have a couple of soft-spots, a little delamination, and a couple of pretty significant dings...

    http://i449.photobucket.com/albums/qq219/smackdaddy_photo/Cat_Progress/c6471bda.jpg

    http://i449.photobucket.com/albums/qq219/smackdaddy_photo/Cat_Progress/f5fd6bf3.jpg

    Then comes the sanding, priming and painting (and tons of other stuff)...

    EXPENSES TO DATE:

    Item
    Initial Purchase Price.................$200
    Wheel for Trailer........................$38
    Lights for Trailer.........................$30
    Hitch for Trailer..........................$34
    Epoxy Resin...............................$60
    Spray Paint................................$27
    Fiberglass Cloth..........................$14
    Pinking Shears...........................$22

    TOTAL......................................$425

    (The Pinking Shears was a stupid purchase. A buddy convinced me they were necessary so the cloth wouldn't unravel. He's right, but for this job it was WAY overkill.)
  • time on the water.....priceless.

    --
    Kenneth Purdy
    Hobie 16
    Nacra 5.2 (2)
    Banshee
    First Coast, Florida
    --
  • good repair and write-up

    looks like this lost cat found the right home
  • Glass cloth will cut cleanly with any good scissors. Pete Begle posted this on another thread;
    "Jametown Distributers for 2,3,4" rolls of glas cloth or any other supplies. Pete"
    These rolls really make life easy. The sides don't pull apart the way cloth cut from a bulk piece does.
    You will end up with a sail-able Cat soon, keep us posted. Good to see you are wearing a decent dust mask.

    --
    Hobie 18 Magnum
    Dart 15
    Mystere 6.0XL Sold Was a handful solo
    Nacra 5.7
    Nacra 5.0
    Bombardier Invitation (Now officially DEAD)
    Various other Dock cluttering WaterCrap
    --
  • Great write up!

    Can't wait for the next installment!

    AJ

    --
    AJ
    Barefoot 12 Proa Outrigger
    Coastal NC, USA
    --
  • Thanks fellas. More coming soon.
  • Okay - time for the next installment...

    We left off having glassed-in the major damage on the hull bottoms, roughed in the fairing compound, and started in on the stripe removal.

    The stripes were pretty easy with a top-of-the-line utility scraper (make sure you buy the one that says "Scraper" on it like mine). You just have be careful to keep the blade really flat in order to not gouge the gelcoat, and work side-to-side in a circular motion...

    http://i449.photobucket.com/albums/qq219/smackdaddy_photo/Cat_Progress/22fcfbdc.jpg

    http://i449.photobucket.com/albums/qq219/smackdaddy_photo/Cat_Progress/05051769.jpg

    Next was sanding and fairing the patches. Since sanding is the dream of every young kid, I made my boys help with this:

    http://i449.photobucket.com/albums/qq219/smackdaddy_photo/Cat_Progress/92617fe8.jpg

    It took about 5 layers to get it just right...

    http://i449.photobucket.com/albums/qq219/smackdaddy_photo/Cat_Progress/8a87d9d7.jpg

    http://i449.photobucket.com/albums/qq219/smackdaddy_photo/Cat_Progress/5ac4ca39.jpg

    But it came out very nicely...

    http://i449.photobucket.com/albums/qq219/smackdaddy_photo/Cat_Progress/7668d8fa.jpg

    Next came the glecoat cracks. We used a conical grinder drill bit and went down to the glass. Sanded back the edges, and filled with fairing compound...

    http://i449.photobucket.com/albums/qq219/smackdaddy_photo/Cat_Progress/3c898e39.jpg

    http://i449.photobucket.com/albums/qq219/smackdaddy_photo/Cat_Progress/d507b2f2.jpg

    Next came the deck work. Overall the decks are fairly solid, but there were 3-4 areas that had taken serious hits and/or were soft. Two of the worst areas were right at the forward starboard pylon.

    Crushed deck - and unbelievably bad patch job with drywall tape..
    http://i449.photobucket.com/albums/qq219/smackdaddy_photo/Cat_Progress/f5fd6bf3.jpg

    Delam with crack in top-deck at pylon..
    http://i449.photobucket.com/albums/qq219/smackdaddy_photo/Cat_Progress/c6471bda.jpg

    So, we sanded them down to the foam and started rebuilding...
    http://i449.photobucket.com/albums/qq219/smackdaddy_photo/Cat_Progress/5a1eb17c.jpg

    http://i449.photobucket.com/albums/qq219/smackdaddy_photo/Cat_Progress/4c4cd0b9.jpg

    http://i449.photobucket.com/albums/qq219/smackdaddy_photo/Cat_Progress/b41dae37.jpg

    We drilled 1/4" holes in the top skin ONLY and used the widely touted epoxy injection method (using an old chalk-line chalk container to squeeze it in).
    http://i449.photobucket.com/albums/qq219/smackdaddy_photo/Cat_Progress/e3cd9aa3.jpg

    One of the things I blew off in this technique was pre-taping the deck. Most people first tape off the entire area then drill to keep from making a mess on the deck. That didn't make sense to me, so I just drilled where I needed to, then taped over the holes to protect the immediate area, then punched through them for the fill. Worked fine and saved a lot of effort.

    If you squint just right, you'll notice it kind of looks like the spawn of George Washington and Buckwheat. But I digress...
    http://i449.photobucket.com/albums/qq219/smackdaddy_photo/Cat_Progress/061f93b4.jpg

    Next came the fairing and sanding of these areas...

    http://i449.photobucket.com/albums/qq219/smackdaddy_photo/Cat_Progress/acf0b00c.jpg

    Then the taping and buildup to match the no-skid height...

    http://i449.photobucket.com/albums/qq219/smackdaddy_photo/Cat_Progress/99b1e24d.jpg

    http://i449.photobucket.com/albums/qq219/smackdaddy_photo/Cat_Progress/eaa5ba27.jpg

    I'll try to match the no-skid pattern in the gelcoat when I get to that point.

    Finally, I had to fix the shroud chainplates. The bolts were missing, as were the interior nuts, so they were only held in place by the bar that ran under hull lip.

    I drilled a bigger raggedy hole (not obsessing at all over the type of bit to use), bought a couple of these bad boys for next to nothing...

    http://www.lindapaul.com/ceramic_tile_installation/picture_butterfly_anchor.JPG

    ...epoxied them into place and filled the hole...and bada-boom!

    http://i449.photobucket.com/albums/qq219/smackdaddy_photo/Cat_Progress/93ebd5a9.jpg

    http://i449.photobucket.com/albums/qq219/smackdaddy_photo/Cat_Progress/a6db8116.jpg

    http://i449.photobucket.com/albums/qq219/smackdaddy_photo/Cat_Progress/2e1a1315.jpg

    We faired the rest of the major gouges, scraches, cracks, etc. (like you see in the pic above) and finished up injecting the other softspot. Then it was time to figure out what to do about the nasty looking finish.

    I read a crapload of posts and articles about paint versus gelcoat. But before even going down that road, I wanted to see if it was possible to polish off the gunk to the gelcoat finish below.

    I started with heavy cut compound, and it began to help...but the skank ran deep...

    http://i449.photobucket.com/albums/qq219/smackdaddy_photo/Cat_Progress/f745fe7c.jpg

    Then I used an orbital sander with 120 grit just to see how much I'd have to take off to get to good stuff. I finally started getting there, but the coat was just a bit too thin...

    Stripe is disappearing:
    http://i449.photobucket.com/albums/qq219/smackdaddy_photo/Cat_Progress/cc43cea2.jpg

    Primer is appearing...
    http://i449.photobucket.com/albums/qq219/smackdaddy_photo/Cat_Progress/32e17bf7.jpg

    So, this wasn't going to work. Now I needed to make the decision as to whether I would paint or gelcoat. Gelcoat is a bit cheaper, but more of a hassle. Paint scratches so easily, especially on a boat like this that takes a beating.

    So, I've decided to roll this gelcoat stuff on...

    http://i16.ebayimg.com/02/i/000/85/a6/f30a_1.JPG

    A gallon costs 1/2 what the boat cost. But it'll be an interesting experiment. I'll let you guys know how it turns out.
    +++++++++++++

    Total spent to date: $478


    Edited by smackdaddy on Jul 26, 2012 - 01:55 PM.
  • smackdaddy

    So, I've decided to roll this stuff on...

    http://i16.ebayimg.com/02/i/000/85/a6/f30a_1.JPG

    A gallon costs 1/2 what the boat cost. But it'll be an interesting experiment. I'll let you guys know how it turns out.


    Great update! It would be great if, when you are done, you could create a start to finish tutorial for the Beachcats Technical album with your descriptions and advice.

    I can't tell from your picture, is that stuff meant to be used as paint?

    Usually I see Interlux Brightside recommended by the painters here.

    http://www.thebeachcats.c…ictures/?g2_itemId=62395

    http://www.thebeachcats.com/gallery2/main.php?g2_view=core.DownloadItem&g2_itemId=62429&g2_serialNumber=3

    --
    Damon Linkous
    1992 Hobie 18
    Memphis, TN

    How To Create Your Signature

    How To Create Your Own Cool Avatar

    How To Display Pictures In The Forums.
    --
  • It's gelcoat. I looked into the Brightside paint, and I know it looks seriously awesome when done right - but I wanted to give the gelcoat a shot. It should last WAY longer than paint.

    We'll see how it turns out. Regardless, I'm using the 10' rule on this boat (if it looks pretty good from that distance, that's good enough for me). I'll leave the pro stuff to the pros.
  • Excellent update! I've got a number of repairs coming up, and it looks like you're touching on almost every one. I'm really looking forward to your experience with gel coat.

    My hulls are good below deck, but the decks themselves are terrible. I was planning to use the Dremel and grinder bit to open up all the cracks, similar to how you've done it, but some areas are so alligatored I'll have to sand them down to primer. I like the 120 grit wheel idea. Did that offer you enough control to get things to the primer without going too far? Because of the hard deck on the P-Cat, I'm going to have to do a LOT of grinding to make this work.

    But what I'm really curious about is what your 10' rule approach will be on the gelcoat. Most of the posts I've read have some sort of caution in there about the amount of sanding required afterward to make the surface smooth. For hulls below deck, I can see that. You want it smooth so it moves through the water. But for a deck? Most of my deck is non-skid anyway. I'm tempted to just roll on two to three layers and call it good. The orange peel effect doesn't sound like it would be a problem on deck. And if I change my mind later, I can always do a sand and polish job on it.

    Do you mind discussing your plans for the gelcoat step?

    Thanks again for the excellent write-up. Freakin' inspirational.

    Tom

    --
    Tom Benedict
    Island of Hawaii
    P-Cat 18 / Sail# 361 / HA 7633 H / "Smilodon"
    --
  • Thanks bene - but let's not get carried away. This thing could fall apart on the first outing. I'm wingin' all this dude.

    For example, I still don't really know what "too soft" means when it comes to the top decks (a problem I see asked about a lot). I've fixed areas that were very obvious, but the decks have a "bit of flex" all the way down. And if I push really hard, I can hear the nasty crunch of delamination. But I really can't be bothered at this point to inject the entire top decks of both hulls. I just want to go sail it with my boys. If it all holds together and we start getting more cracks or significant softness, we'll do the injections then.

    As for the sander, this is what I'm using:

    http://www.budgetwisehome.com/wp-content/uploads/2011/09/Must-Have-Tools-Sander.jpg

    And, yes, it gives you plenty of control while still taking off enough to move quickly. It's freakin' awesome.

    The glassing and fairing has been WAY easier than I thought it would be. I was scared to death to start cutting into things and grinding down to the foam, but it's been easy. Now we'll see if it holds up.

    On the gel coat, the stuff I'm looking at says that you roll on 2 coats, do a light sand to smooth, then put on the final coat 24 hours later after a thorough cleaning.

    I honestly don't have a plan. I'm just going to read the instructions and go for it. Like you say, with gel coat, I can sand/compound it smooth if I need to to get that 10' shine.


    Edited by smackdaddy on Jul 26, 2012 - 08:07 PM.
  • GOOD GOD... Check out the info on EBAY... http://www.ebay.com/itm/E…in_0&hash=item483a602698.. Need instruction and visual.. O Yah.. Hal

    --
    Hal Liske
    Livermore CA
    H 16 (6+ 1.. Friends) H 3.2 N 5.2 (2) H 17 (2) H-18
    Nacra 5.8 (son's) H 20 (Friends)
    It's a Sickness

    I Need a A Cat Please
    --
  • Yeah - it's pretty insane. Let's just say that visual design is not their strong point. But at least it's thorough.
  • Okay a bit more progress...

    The mast was pretty banged up, stained, scratched, you name it. Here's a couple of pics of the before...

    http://i449.photobucket.com/albums/qq219/smackdaddy_photo/Cat_Progress/45dd12be.jpg

    http://i449.photobucket.com/albums/qq219/smackdaddy_photo/Cat_Progress/4a7d3740.jpg

    http://i449.photobucket.com/albums/qq219/smackdaddy_photo/Cat_Progress/a31c0e11.jpg

    http://i449.photobucket.com/albums/qq219/smackdaddy_photo/Cat_Progress/30753b63.jpg

    I had already painted the castings with a satin black spray paint - and I had a can or two extra, so I thought, what the hell, and tore into the mast.

    First, I power-washed the whole thing, used a scrubber to get the heavy stuff off, then did a final pass with acetone on anything gooey.

    I DID NOT get crazy with sanding, fairing the rough spots or dents, etc. I didn't care about that stuff...I just wanted it to look good from 10' away.

    After that, I taped off the shiny bits, donned the mask and rattled the can...then...

    http://i449.photobucket.com/albums/qq219/smackdaddy_photo/Cat_Progress/bcc4e341.jpg

    http://i449.photobucket.com/albums/qq219/smackdaddy_photo/Cat_Progress/414d8c06.jpg

    I put on 2 coats along the whole thing - and it was looking okay...

    http://i449.photobucket.com/albums/qq219/smackdaddy_photo/Cat_Progress/c2a11946.jpg

    The problem was, I couldn't quite figure out how to blend the paint well enough to get rid of the overspray pattern...

    http://i449.photobucket.com/albums/qq219/smackdaddy_photo/Cat_Progress/a4417277.jpg

    There would be beautiful shiny spots, then dull spots. That just wouldn't do.

    So, I hopped on Youtube and looked up "spray painting a car" - and found a video that explained it. I was "doing it backwards". In other words, I was getting a really nice flow on the broad part of the mast - then I'd go to the leading/traling edges and screw up what I'd just done.

    I switched it...spraying a clean flow on the edges, then doing the broad side. Worked like magic...

    http://i449.photobucket.com/albums/qq219/smackdaddy_photo/Cat_Progress/10ed3ea7.jpg

    http://i449.photobucket.com/albums/qq219/smackdaddy_photo/Cat_Progress/932a1a33.jpg

    http://i449.photobucket.com/albums/qq219/smackdaddy_photo/Cat_Progress/26c41298.jpg

    Not bad for Valspar spray paint eh? We'll see how long it lasts before it's trashed. Even then though, at $4 a can, I can do A LOT of touch up for cheap.

    I used about 9 cans of spray paint ($36) - and spent a total of maybe 5 hours doing this thing.

    Next comes painting the hulls. Stay tuned!


    Edited by smackdaddy on Aug 10, 2012 - 08:21 PM.
  • I know everyone has been waiting breathlessly for the next installment of "De-Skanking Lilo". So here we go...

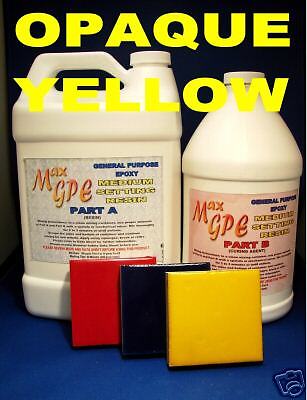
    My plan was to gelcoat the hulls using this stuff:

    http://i16.ebayimg.com/02/i/000/85/a6/f30a_1.JPG

    I'd seen this video showing application with a roller:

    Gelcoat with roller

    They said 3 coats would provide good coverage - and I LOVED the idea of it lasting for years with the ability to buff out scratches, dullness, etc.

    The issue was the cost...$110 (with shipping) for 1 gallon. And though the specs said that gallon would cover both my hulls - it was possible that I'd have to get a second gallon since I think that's the only quantity they sell. $220 started sounding a bit scary. I also found a couple of horror stories online about guys that used the stuff with bad results - although it sounded like they had done a poor job of prep.

    I had also been looking at, and talking to lots of people about, Brightside paint. I'd seen plenty of videos of people applying it with roll and tip - and getting crazy great results. But I'd also seen lots of people talking about how easily it scratches. The big plus was the cost/coverage versus the gelcoat above. I found a source online that sold it for $28/quart. The specs indicated that I could get away with 2, maybe 3 quarts.

    Since my prime objective on this cat restore was to do everything as cheaply as possible, I decided to bite the bullet on doing extra maintenance (which I REALLY didn't want to do) and go for the less expensive paint option.

    So, I took a print-out of the online price for yellow Brightside to West Marine - who price-matched it for $28/qt. (down from $45). Booyah!

    First, I had one more soft-spot to repair. Did the old epoxy injection as shown.

    http://i449.photobucket.com/albums/qq219/smackdaddy_photo/Cat_Progress/file-1.jpg

    It worked perfectly. Then it was a final sanding and cleaning to prep for the paint...

    http://i449.photobucket.com/albums/qq219/smackdaddy_photo/Cat_Progress/file.jpg

    http://i449.photobucket.com/albums/qq219/smackdaddy_photo/Cat_Progress/file-2.jpg

    With the first hull up on the saw-horses, it was time to give it a shot. I used a Whizz roller and a foam "brush", rolling vertically, then brushing horizontally from the edge of the new paint backward. Paint straight out of the can.

    I did it exactly like this guy is doing it:

    Brightside Roll and Tip

    Unlike his dark blue paint, however, I could immediately see that the yellow was not going to cover as quickly as I'd hoped...and I was nervous that the stripes would show through...

    http://i449.photobucket.com/albums/qq219/smackdaddy_photo/Cat_Progress/file-3.jpg

    After the first coat, I lightly sanded with 320 paper, carefully cleaned the debris off, then laid on a second coat. Then I repeated all that for a third coat. Laying on the Brightstide was STUPID SIMPLE. Seriously, the stuff lays down like you wouldn't believe. It's pretty hard to screw up.

    http://i449.photobucket.com/albums/qq219/smackdaddy_photo/Cat_Progress/file-7.jpg

    http://i449.photobucket.com/albums/qq219/smackdaddy_photo/Cat_Progress/file-6.jpg

    http://i449.photobucket.com/albums/qq219/smackdaddy_photo/Cat_Progress/file-4.jpg

    http://i449.photobucket.com/albums/qq219/smackdaddy_photo/Cat_Progress/file-5.jpg

    Granted, it's not "perfect" - but I was pretty amazed at the smooth finish. And it looks wicked awesome from 10' away (which was my goal).

    The problem with Brightside comes with the non-flat bits. I flipped the hull and started working on the top-deck. The roll and tip went great until I hit the pylon. Trying to roll that thing, then smooth it with the foam brush was a nightmare.

    http://i449.photobucket.com/albums/qq219/smackdaddy_photo/Cat_Progress/file-10.jpg

    http://i449.photobucket.com/albums/qq219/smackdaddy_photo/Cat_Progress/file-11.jpg

    With Brightside you really have to move pretty quickly. If you wait too long, you don't get the smooth flow from the new stuff into the stuff you laid down previously. It seemed I had about 3 minutes or so from the old section to the new (I painted in sections of about 18" from one end to the other). If I missed that window, the joint between the two sections wouldn't flow well, leaving some roughness. So you have to just go from one end to the other in a single pop. You can't waste any time.

    The pylons really slowed me down. So I came up with another plan...which also had it cons. I decided to pre-paint the other pylons...

    http://i449.photobucket.com/albums/qq219/smackdaddy_photo/Cat_Progress/file-12.jpg

    The con with this is that joints between already dried paint, and new paint never smoothes out perfectly. But with the non-skid I was able to hide the problem pretty well...

    http://i449.photobucket.com/albums/qq219/smackdaddy_photo/Cat_Progress/file-18.jpg

    The paint was so amazing that the original production flaws started showing up:

    http://i449.photobucket.com/albums/qq219/smackdaddy_photo/Cat_Progress/file-17.jpg

    But I was pretty pleased with how it was turning out.

    http://i449.photobucket.com/albums/qq219/smackdaddy_photo/Cat_Progress/file-14.jpg

    http://i449.photobucket.com/albums/qq219/smackdaddy_photo/Cat_Progress/file-16.jpg

    http://i449.photobucket.com/albums/qq219/smackdaddy_photo/Cat_Progress/file-13.jpg

    The problem was...I was using a hell of a lot of paint! 3 coats, and you could still just make out some darker areas...

    http://i449.photobucket.com/albums/qq219/smackdaddy_photo/Cat_Progress/file-29.jpg

    By the time I finished this hull, I'd gone through 2 quarts - and just a tiny bit of the third. This was getting expensive. I was starting to wonder if the paint was the right call over the gelcoat. But it sure looked nice:

    http://i449.photobucket.com/albums/qq219/smackdaddy_photo/Cat_Progress/file-23.jpg

    It took way longer than I thought it would. Was way too much sanding. Was way more expensive than I thought it would be (I ended up going through just over a gallon of paint) - but Lilo is starting to shine baby!

    http://i449.photobucket.com/albums/qq219/smackdaddy_photo/Cat_Progress/file-25.jpg

    So it was time to put her back together. I re-assembled the tramp frame and had my boys lace it up.

    http://i449.photobucket.com/albums/qq219/smackdaddy_photo/Cat_Progress/file-24.jpg

    http://i449.photobucket.com/albums/qq219/smackdaddy_photo/Cat_Progress/file-30.jpg

    It was at this point that I realized we had brought this skanky thing a LONG ways back...

    From here...
    http://i449.photobucket.com/albums/qq219/smackdaddy_photo/Cat_Progress/45dd12be.jpg

    To here...
    http://i449.photobucket.com/albums/qq219/smackdaddy_photo/Cat_Progress/file-26.jpg

    We raised the mast, rigged everything, and hoisted the original, tattered sails for the glory shot...

    http://i449.photobucket.com/albums/qq219/smackdaddy_photo/Cat_Progress/file-31.jpg

    We give you the 1975 Spirit 17!

    Next is finishing up the rudders and tiller extension. Then it's off to the lake.

    We're about to have some fun!


    Edited by smackdaddy on Sep 02, 2012 - 09:38 PM.
  • looks great but the sail looks like it needs battens

    --
    Angelo
    1983 Hobie 16 Cat fever #55697
    2008 laser 4.7/radial #190471
    SARASOTA, FLORIDA
    S.S.S
    S.Y.S.P
    --
  • I pulled all the battens out. I won't be using those sails. They're trashed. I just wanted a photo with them since they're original.

    I have some Hobie sails I'll be using.
  • Okay - time for another installment on the rehab of this old slag.

    The last significant job I had on the pre-splash list were the rudders. If you recall, the originals were complete crap...

    http://i449.photobucket.com/albums/qq219/smackdaddy_photo/Cat_Progress/e22194de.jpg

    The raise/lock/lower rigging was all gone, the rudders themselves were painted wood, and one of them had serious rot around the pivot bolt. I'm no CharlieCobra - so rebuilding those was out.

    They were a Prindle type rudder and casting - so I started looking around online for used rudders and parts. There were a couple of choices of rudders only for $80+ each, and a couple of rudder/casting assemblies for quite a bit more. But nothing "rehab cheap".

    So, I looked for Hobie options, thinking I could just use a different set up. Same thing. $200+ any way you go.

    Finally, I started watching Craigslist. And some dude in Pensacola put up a steal. Full Solcat rudder assembly, rudders - AND 2 extra Hobie rudders...all for $50. The shipping was another $56...but $106 was a GREAT deal...especially since I can sell the two Hobie rudders, making a few bucks back on the transaction.

    All the pieces were there, but they were in pretty rough shape. The dude had Bondo'd one of them...very poorly. So I sanded them down, faired them, then painted them and the castings, then figured out how to mount them on the Prindle style gudgeons...

    http://i449.photobucket.com/albums/qq219/smackdaddy_photo/Cat_Progress/file-33.jpg

    You'll notice the creative use of PVC pipe as spacers...

    http://i449.photobucket.com/albums/qq219/smackdaddy_photo/Cat_Progress/file-1-1.jpg

    The lockdown cables were in good shape, but I had to rig the raising lines. For this I used cheap 1/4" braided line. The trick was rigging it so I could lock the rudders in the upright position. So, back to the PVC.

    I drilled a hole for the handle and knotted the line with about a 6" tail. This way I can roll the extra line around the handle when the rudder is up, then tie off the tail with a couple of half-hitches. Works perfectly.

    http://i449.photobucket.com/albums/qq219/smackdaddy_photo/Cat_Progress/file-2-1.jpg

    Next came the cross-bar. This is painted metal conduit, with PVC cap fittings hammered in to finish the edge.

    http://i449.photobucket.com/albums/qq219/smackdaddy_photo/Cat_Progress/file-6-1.jpg

    I used nylon washers between the tillers and crossbar to handle the back-and-forth, then added the tiller-extension connection in the center using a cheap conduit mount with nylon washers again.

    http://i449.photobucket.com/albums/qq219/smackdaddy_photo/Cat_Progress/file-3-1.jpg

    The tiller extension is also conduit to which I'll add a handle of some sort.

    Finally came the mast rest. It ain't pretty, but it works great...

    http://i449.photobucket.com/albums/qq219/smackdaddy_photo/Cat_Progress/file-4-1.jpg

    http://i449.photobucket.com/albums/qq219/smackdaddy_photo/Cat_Progress/file-5-1.jpg

    If the weather holds, it's time to sail this slag this weekend! I'll let you know how the maiden voyage goes!

    As for time and cost, here you go:

    Costs $/Unit Sub-Total
    Boat
    Initial Purchase Price 1 $200 $200
    Epoxy Resin/Hardner 1 $60 $60
    Spray Paint 23 $4 $92
    Fiberglass Cloth 2 $7 $14
    Pinking Shears 1 $22 $22
    West 407 Filler 1 $11 $11
    Bolts/Toggles 2 $2 $4
    Tramp Repair 1 $60 $60
    Used Rudders (+shpg) 1 $106 $106
    Paint (Brightside Qt + Shpg) 5 $36 $180
    5/16" Line 4 $5 $20
    1/4" Line 1 $5 $5
    Rollers 4 $9 $36
    Brushes 32 $1 $32
    Acetone 2 $8 $16
    Sander discs 1 $8 $8
    Conduit 2 $2 $4
    Sand paper 1 $4 $4
    Jib Blocks 2 $13 $26


    Trailer
    U-Bolts 2 $1 $2
    Hose 1 $6 $6
    Wheel for Trailer 1 $38 $38
    Lights for Trailer 1 $30 $30
    Hitch for Trailer 1 $34 $34
    Lug nut 0 $0 $0
    Stand 1 $34 $34


    TOTAL $1,044


    Hours
    Disassemble/Clean 6
    Hull Repair/Prep 35
    Hull Paint 37
    Mast Paint 6
    Rudders 12
    Assemble 5


    TOTAL 101
  • How about a sailing report, did you get out on the water?

    Could you create a "restoring a Spirit 17 album in the "Beachcats Technical" section? Your practical advice and pictures will really help the next guy faced with restoring a beachcat, regardless of brand.

    And one more thing if it's not to much trouble, I noticed we don't have a "Spirit 17" album in the "Beachcats Identification" section. Please create one with some of your good complete boat pictures, any info you have about the brand, and a clear shot of the sail logo. Will help a lot the next time this mystery boat comes up.

    Thanks,

    --
    Damon Linkous
    1992 Hobie 18
    Memphis, TN

    How To Create Your Signature

    How To Create Your Own Cool Avatar

    How To Display Pictures In The Forums.
    --

Go to page 1 - 2 [+1]:

No HTML tags allowed (except inside [code][/code] tags)

  • Options

This list is based on users active over the last 60 minutes.