| Vol 2 - Issue 7 | May/June 1998 |


|
Raking Rudders Correcting Helm on a Hobie 16 By Bill Mattson Last year, we raced our Hobie 16 for the first time, at the San Diego Classic regatta. After examining the other boats, and talking to the “fast guys”, our first project was to “rake” the mast. We replaced the standard shrouds with a set of those made for a Hobie 17, then replaced the standard Seaway main blocks with a set of Harken low profile blocks. We now had a boat that would perform better upwind, and be less likely to pitchpole. Unfortunately, we also had a boat with one hell of a “weather helm”. A weather helm is one that, when released, will tend to steer the boat into the wind. (Incidentally, a leeward helm is one that will tend to steer the boat away from the wind, and is considered quite dangerous, since if you fall off of your boat it will sail away without you.) While a slight degree of weather helm is ideal, my tiller felt like I had an elephant on a leash. Raking the mast will move the center of effort aft, resulting in a loading up on the rudders. While you cannot reduce the load on the rudders, you can effect the load on the tiller. This is achieved by raking the rudders under the boat. Unless your boat is equipped with factory rudder rake adjustments, you have 2 choices. Either purchase and install a rudder rake adjuster kit, or redrill the tiller connector holes on the rudders. This article shows how to do the later. What you will need: 1. Marker or pencil 2. Straight edge 3. A ruler, preferably a small square. 4. Two 1/2 inch wrenches 5. A hammer and small rod or bolt 6. Marine Tex or other 2 part epoxy 7. 60 and 100 grit sandpaper 8. A drill press |

|
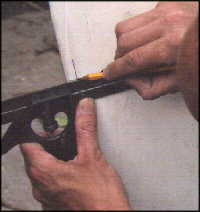
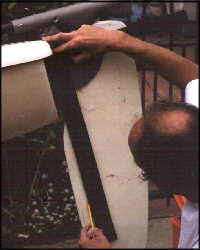
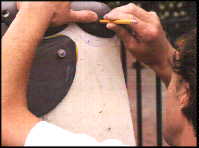
Start by aligning the straight edge with the rudder pin and drawing a line
down at least 15 inches below the bottom of the rudder casting.
|
|
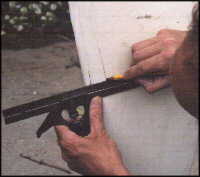
Place the ruler or square at the point 15 inches below the rudder casting.
Note the distance between the leading edge of the rudder and the line
drawn in the last step. Record the measurement. With a raked mast,
this measurement needs to be increased to 1 3/8” to 1 1/2” inch.
|
|
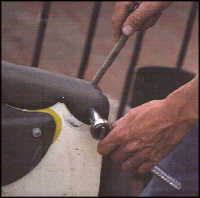
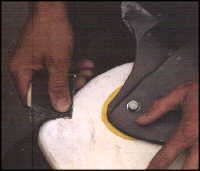
Using the wrenches, remove the nut and bolt set that holds the tillers to
the rudders. Note that the bolt may be difficult to remove. You may
need to use a small hammer and rod to force the bolt out.
|
|
Roll up some 60 grit sandpaper and run it through the hole.
|
|
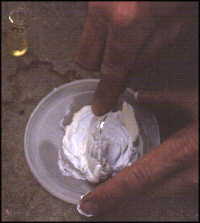
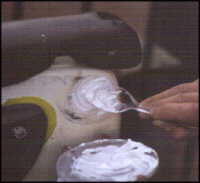
Mix up the epoxy according to the manufacturers instructions. While
Marine Tex is pictured here, we ended up using JB Weld for the final
job. See our product review for details.
|
|
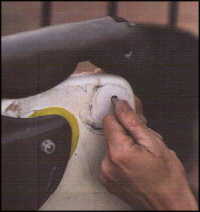
Fill the holes with the epoxy. If the epoxy is thick enough, you can apply
it while the rudders are still on the boat. If it is thinner, you may want to
remove the rudders (by removing the rudder pins) and place them on a
bench with some masking tape over the bottom of the hole.
|
|
Once the epoxy has cured, sand it to match the rudder surface with 60
grit sandpaper. If you’re anal like me, finish it up with 100 grit.
|
|
Reinstall the rudders using the rudder pins. At the point 15” below the
rudder casting, make a mark about 1 1/2” in from the leading edge of the
rudder.
|
|
Move the rudder forward (under the boat). Hold a straight edge even
with the center of the rudder pin and check the distance to the mark
made in the previous step. Move the rudder accordingly until it matches
up. (Note that your rudders should hold the position without falling. If not,
you need to install/add rudder bushings. See our previous article on
rudder tuning.) We were able to get to about 1 3/8”, since the rudder
was against the casting and would not move further forward. We
adjusted our measurement on the opposite rudder to insure a match.
Reconsider your wife's suggestion about the Rogaine. |
|
Verify that the cam is in the “up” position. Engage the tiller arm into the
cam. It is imperative that the tiller arm be firmly against the rudder cam,
or this step will screw things up. Have an assistance push the tiller
assembly firmly forward against the cam. Recheck the straight edge
measurement to be 1 1/2”. When this is all set, stick a pencil into the
tiller casting hole and mark the new position.
|
|
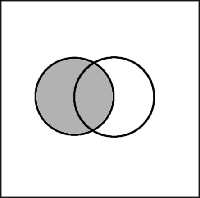
Note that the change will be subtle. The relationship between the old and
new holes will look similar to this.
|
|
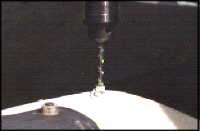
Remove the rudder and place it in a drill press. Do not attempt to drill
this by hand. You will probably not get the hole drilled straight, and the
drill is going to tend to follow the epoxy anyway. Clamp the tiller firmly
in the drill press, assuring that the drill lines up with your mark.
|
|
| Reinstall the rudders. |
|
Take the boat out and test the results. In our case, it was perfect, with just a slight amount of weather helm. If you find that your boat has leeward or neutral helm, you have raked the rudders too far forward. Do not continue to sail your boat with a leeward or neutral helm. You can correct this dangerous situation by redrilling the holes and reducing the rudder rake. Use the original and new measurements to determine what the correct measurement should be. Bill Mattson mattson@earthlink.net Back to Features |